
In the course of digital time, photos, videos, games, etc. have evolved. However, not only the (graphic) quality has increased, but also the memory consumption. While there are more options for cheap memory nowadays, a 4K movie with 50GB still consumes a non-negligible amount of today’s SSDs or hard drives. Especially when this memory is installed in a PC or notebook, it can quickly become scarce here. Network attached storage (NAS) is a nice solution to create space on the internal hard drive. With the help of a NAS, data can be made available in the (home) network and accessed from many devices such as smart TVs, smartphones or even PCs and notebooks. Openmediavault is a free NAS software solution.
Openmediavault is an open source application. In fact, it is a complete operating system based on Debian, which has been equipped with tools, extensions and a web interface to satisfy all the needs of your own home server. Developers can report bugs in the Openmediavault repository on Github and also fix them themselves.
How is a NAS built?
Basically, an Openmediavault-based NAS is a normal computer. As a rule, such a solution hardly differs from an office PC except for the number of hard disks. However, since a NAS usually runs in continuous operation, it is worthwhile to use power-saving hardware. It is also possible to use a Raspberry Pi, but the standard installation method via ISO image cannot be used here due to the ARM architecture.
In order to use the correct hard disks in Openmediavault for the shares in the network, the installation of the operating system should take place on a USB stick or on a small SSD. So if you choose a NAS with Raid 1 (data security), you need in this case:
- 1 USB stick / SD card for the operating system
- 2 hard disks with the same capacity, in the best case identical models
How to install Openmediavault?
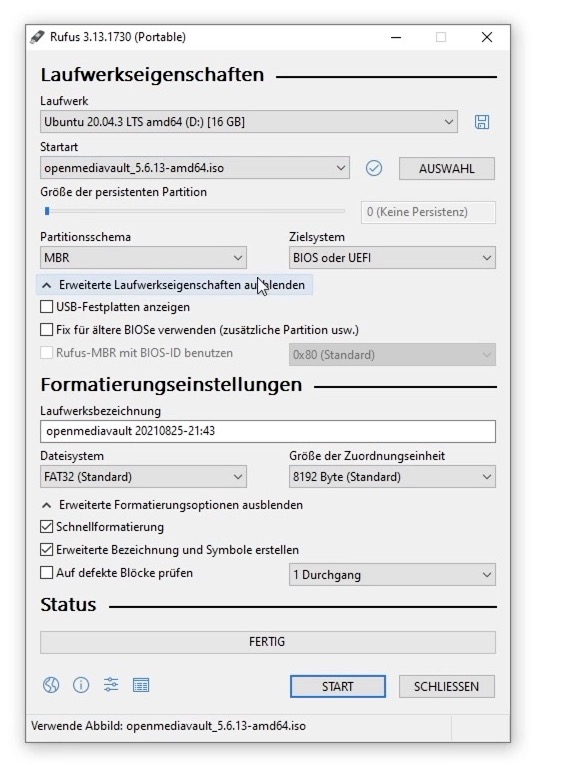
As already mentioned, the developers provide a complete ISO image for download. In order to boot the NAS from this image, the image must either be burned to a DVD or extracted to a USB stick via Rufus so that you can use the USB stick for the installation. The method via Rufus is generally more common and therefore we will use this method in the guide.
In the Rufus main window, we only need to select the target USB stick and the downloaded ISO file. The remaining settings are set automatically. With a click on Start the writing process to the USB stick begins.
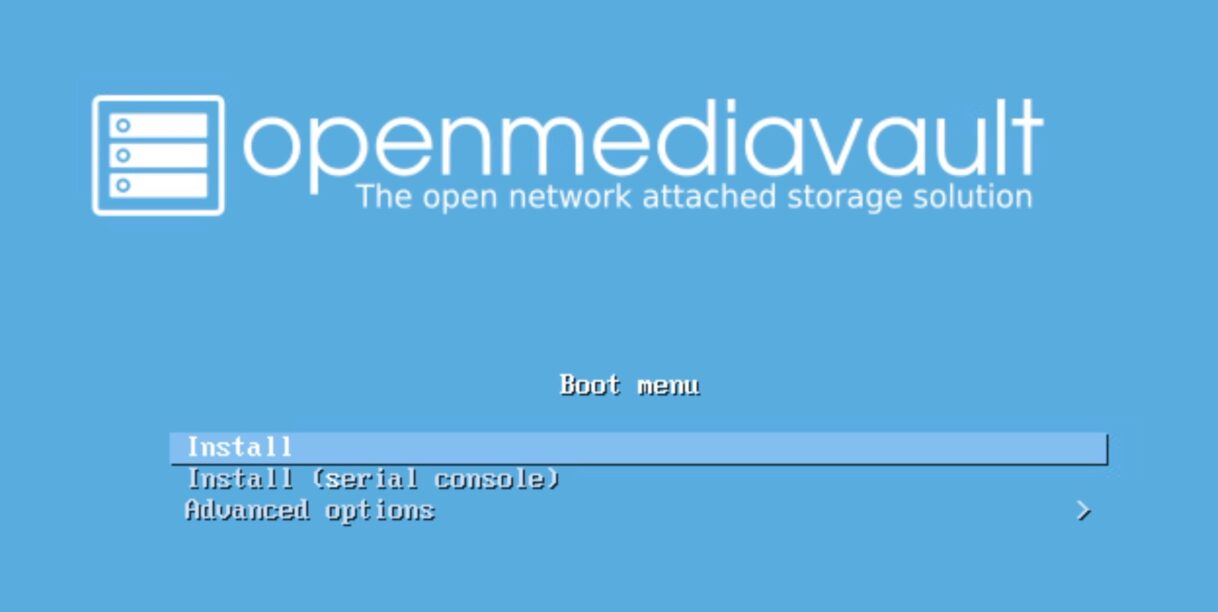
After the writing process is finished, we insert the USB stick into the server and switch it on. Depending on the settings, the server either starts automatically from the USB stick or the stick must be selected via the boot menu. The boot menu can usually be reached via one of the F-keys, usually a corresponding note is displayed when the server is started. If everything has worked, the screen looks like this:
After we have specified all language and region settings, the installation asks us for the computer name. This name is used (if the router is configured correctly) to access the server without having to remember the IP address. This name can be freely assigned.
Afterwards we have to set a root password. This password can be used later to log in directly to the Linux system via SSH, for example. This password is not relevant for pure NAS use.
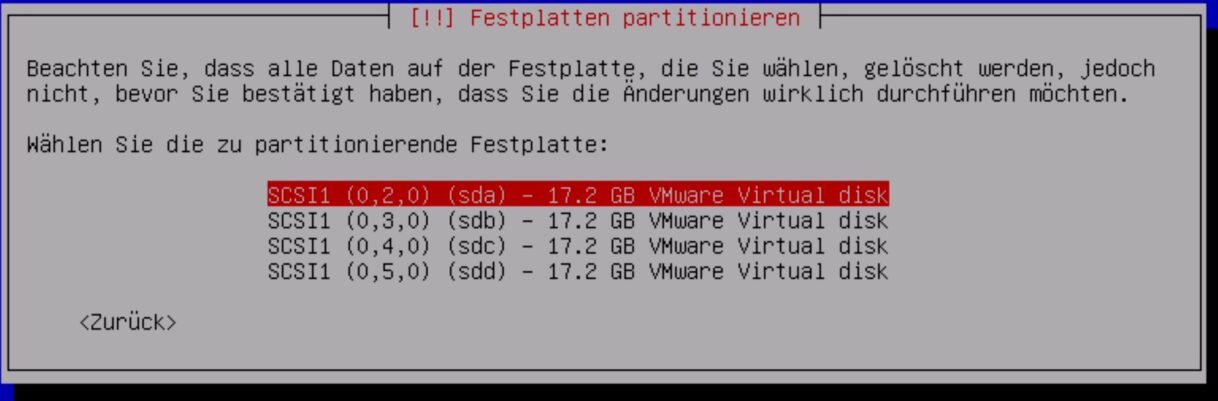
Next, we need to select the hard drive (or USB stick / SD card) on which the operating system is to be installed. The corresponding drive can be identified normally by the displayed name or size. Once we have selected the drive, the hard disk will be formatted and the installation will begin.
After that, we are only asked for the selection for the package management servers. Here we can choose the region that is closest and confirm the correspondingly stored default server. After that, the installation is complete. As soon as the hint comes, we can remove the installation stick as well as the screen and keyboard. The server then restarts and the configuration continues via the browser on another PC.
After installation
In order to access the web interface of Openmediavault, we just need to call the IP address or the previously defined hostname. There we will be greeted by a login window. The default login data are “admin” and “openmediavault”.
The first step is to prepare our hard disks for use with Openmediavault. Here it depends on the number of hard disks and the desired use. If we have only one hard disk, we have to follow method 1. If we have several hard disks and want to use a RAID, we go by method 2.
1. method with single drives
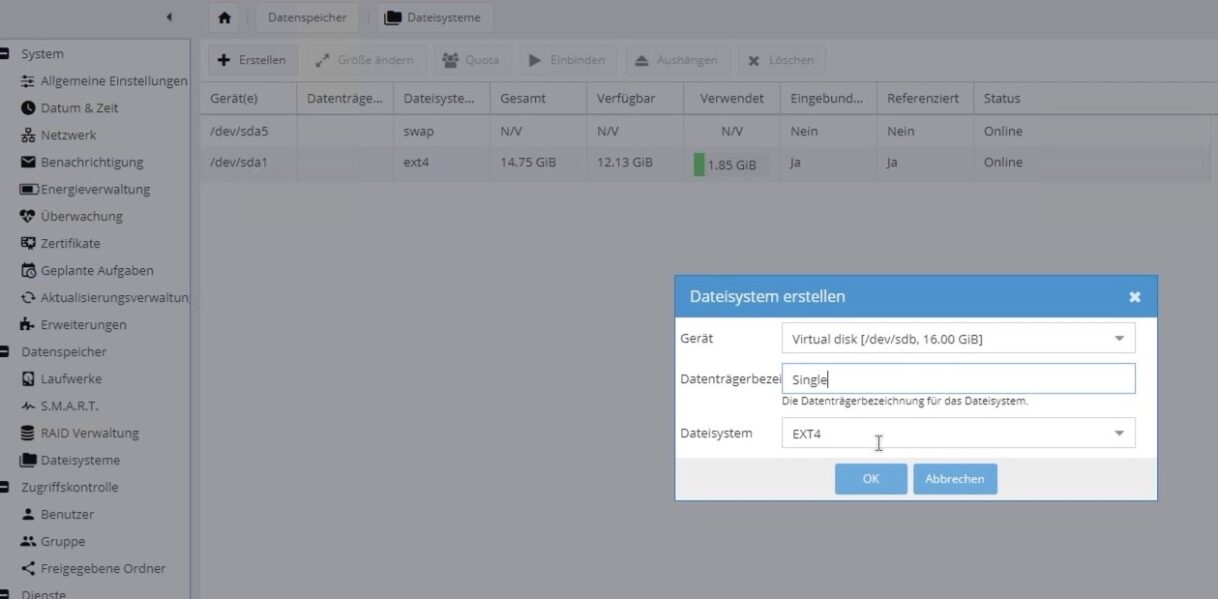
To mount a single drive directly, we click File Systems in the left menu tree and click Create. In the popup window that appears, we select our desired disk and assign a name. We can leave the file system on EXT4. Clicking OK confirms the whole thing and the formatting of the hard disk begins. After formatting is complete, we still need to activate the file system by clicking Mount.
2. method with RAID
The RAID method requires an additional step. Before we can create a file system on the hard disk, we must first switch to RAID management in the left menu tree. There we can create a new RAID volume by clicking Create. In this popup we assign a name and select the RAID level.
- RAID 0 / Stripe: Data blocks are distributed to the hard disks alternately. This increases the performance. If one hard disk fails, all data is lost.
- RAID 1 / Mirror: The data blocks are written to all hard disks in parallel. This halves the available capacity, but the data is still available even if one hard disk fails.
- RAID 5/6: Here one / two hard disks are used for parity data. This means that the RAID can cope with the failure of one / two hard disks without data loss occurring.
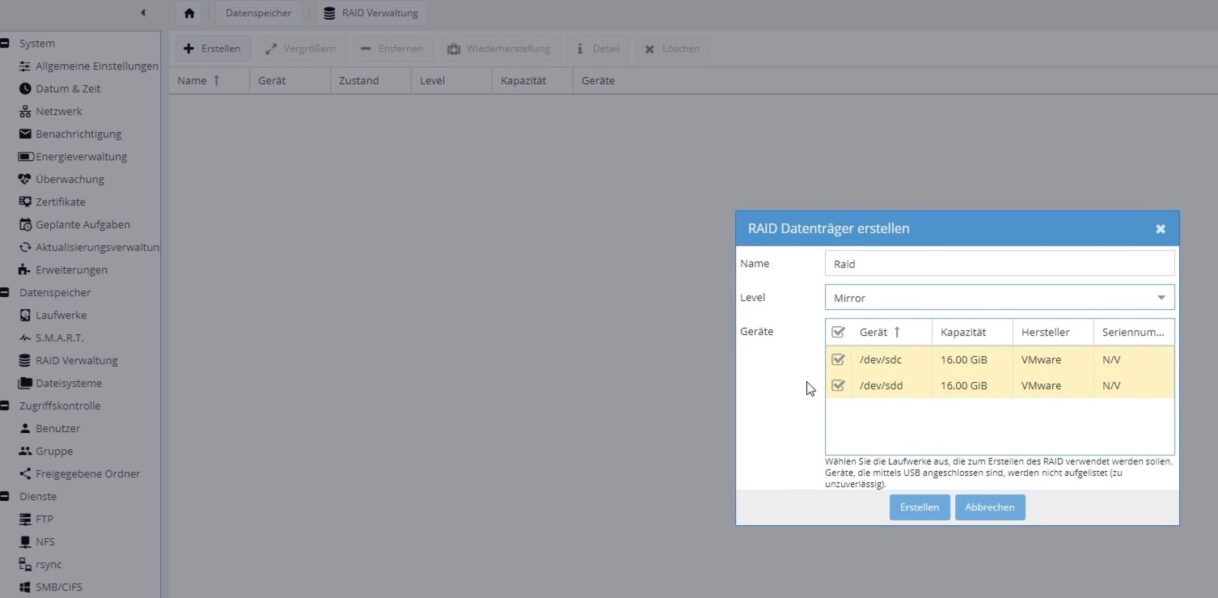
We then select the hard disks that we want to add to the RAID volume and confirm the selection with Create. Only then do we switch to the File Systems menu and create and mount our file system on the RAID as described in Method 1.
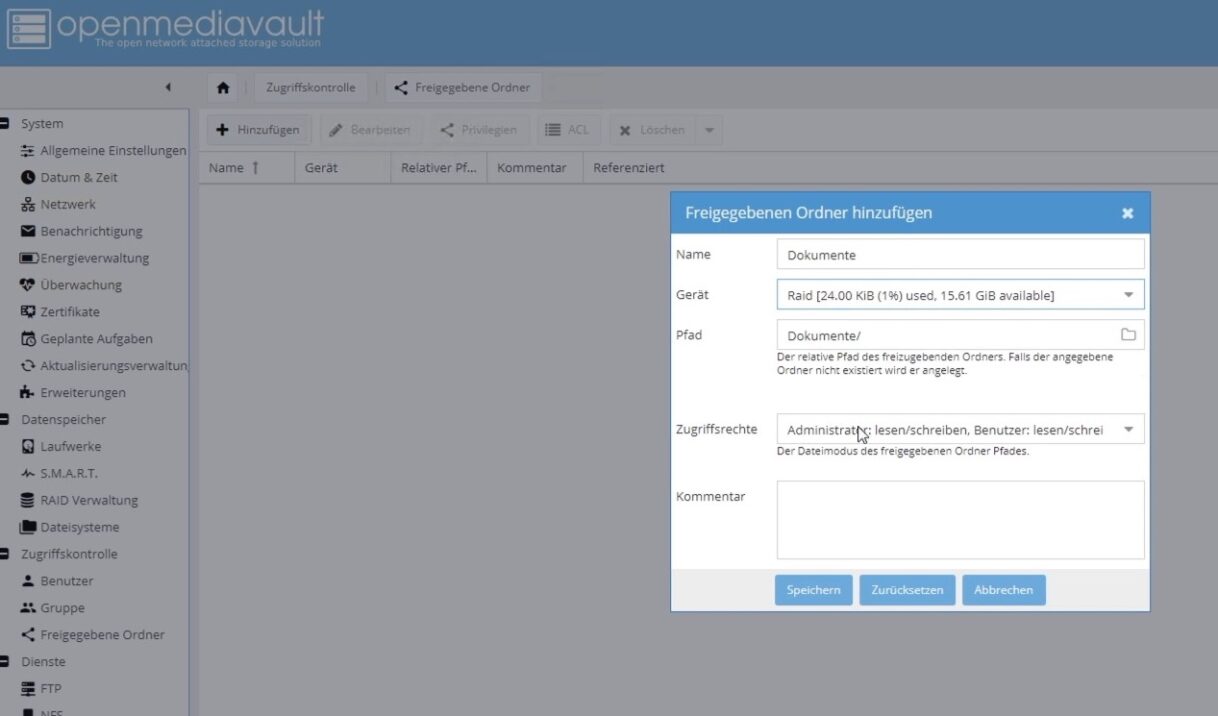
After that we can create our shared folders. These folders map the structure of our network drive. When adding the folder, we also need to select the drive on which the folder will be stored.
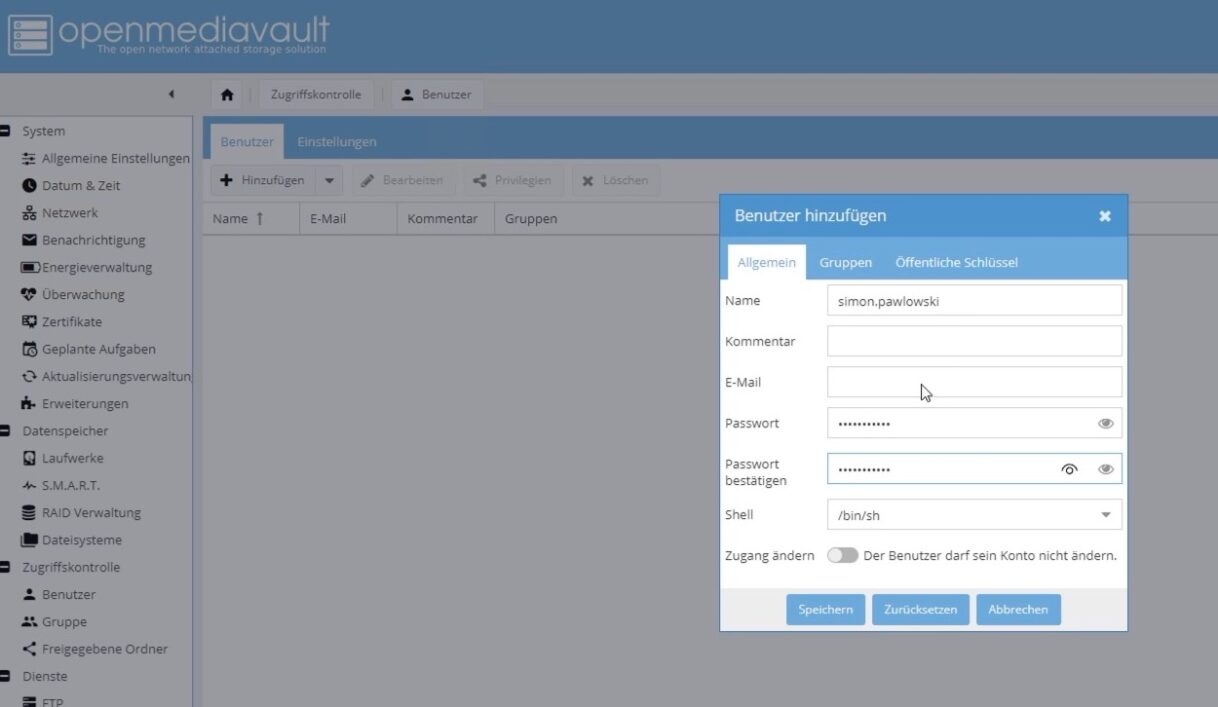
In order to be able to access this share, we have to create a user under User.
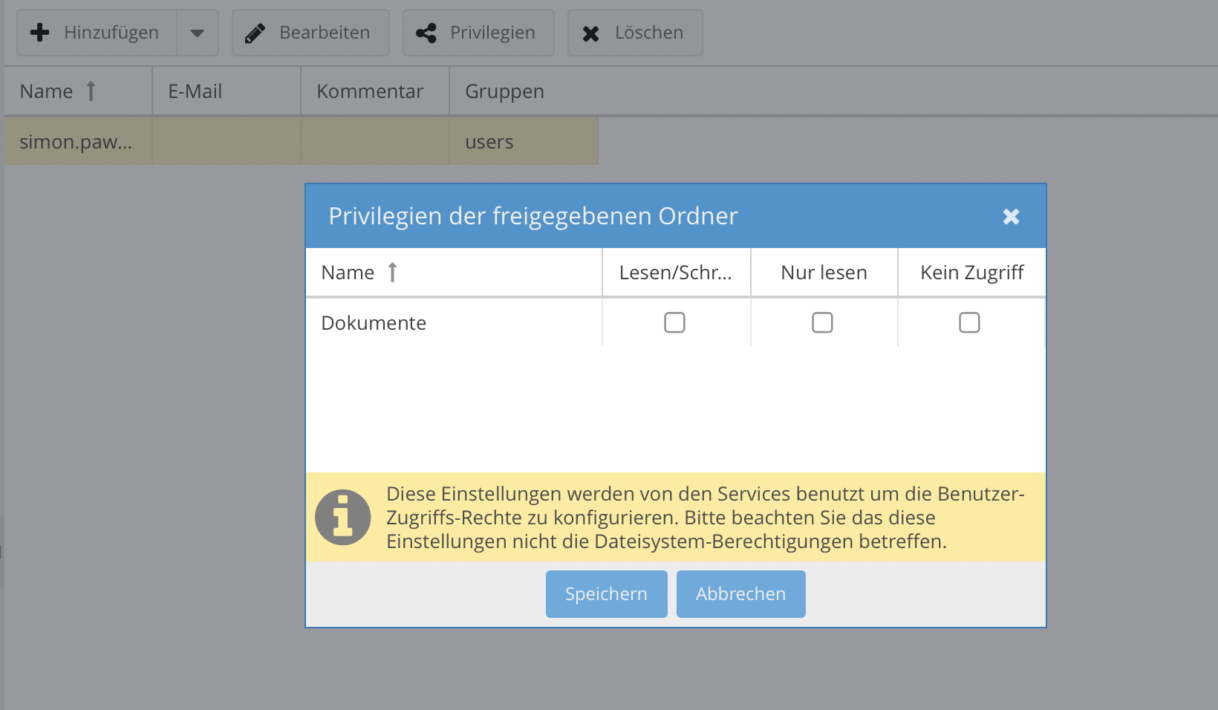
This user already has the rights to access our shared documents folder by default. If we want to individualize the permissions, we can assign the shares individually under Privileges.
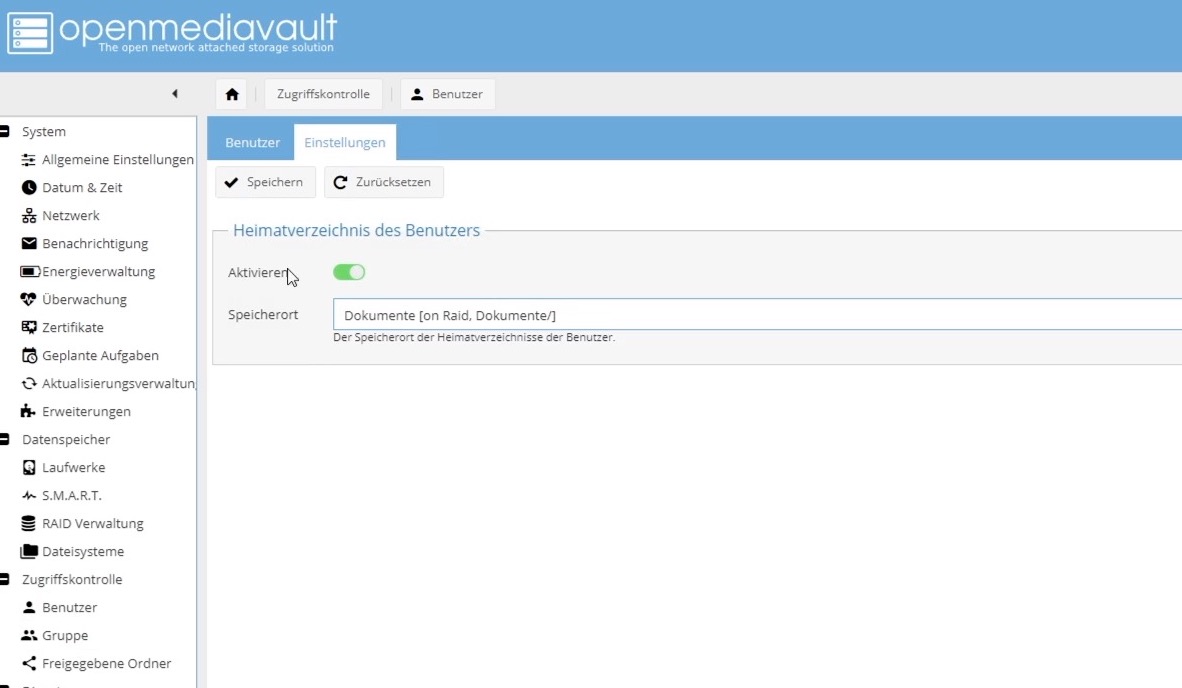
In addition, we can still activate the user home directories under Settings. This will provide each user with a folder that only they can access. To create this folder, we need to select a share in this setting, which will serve as the storage point of these folders.
When all users and shares are created and configured so far, we can enable the SMB service. This will allow Windows to easily access the drive. Only the checkbox at Enable as well as at “Enable home directories for users” has to be set.

In the shares tab we can then specify which of the previously set up shares should be available via SMB. After that, the setup is complete and the network drive can be used.
How do I connect the network drive to my PC?
Now we just need to connect the network drive in Windows. This is easily done in Windows Explorer by clicking on Computer -> Connect network drive. A window opens in which we enter the desired drive letter and the path to the corresponding share. This must be done separately for each shared folder (i.e. the main folders that we have created in Openmediavault).
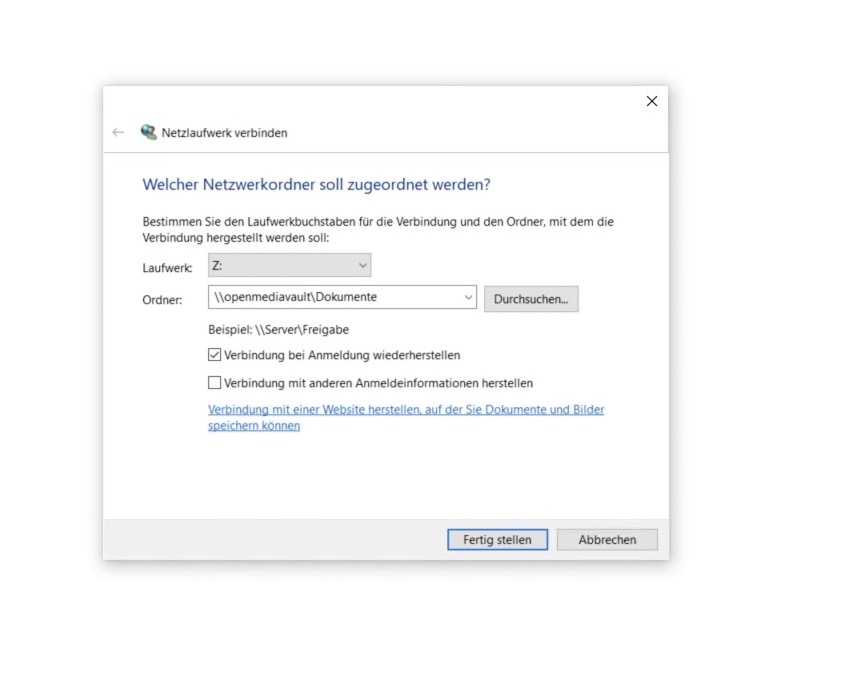
After entering the user data of our Openmediavault user, the folder is connected and visible in the explorer.