
Some time ago, Twitch significantly relaxed the guidelines for multistreaming. As a Twitch partner, it is now much easier to stream your content on several platforms at the same time and thus significantly increase your reach. In Germany, however, this poses a new problem: multistreaming puts a significant strain on the internet connection when uploading. This is where a so-called restreamer can help. In this article, we show you how to set up and use such a restreamer, in our case the open source Restreamer from Datarhei.
What is a restreamer?
Basically, the Restreamer switches between our OBS and the streaming platforms (Twitch, YouTube, Kick, etc.). Instead of sending our stream directly to Twitch, our OBS sends the data to the Restreamer. From there, the software then distributes the streams to the (freely adjustable) destinations. Since the Restreamer can be operated on a server outside our home network, we save bandwidth here, as only one stream has to run over our internet connection and the (fast) internet connection of the server in the data center takes over the bandwidth-intensive distribution to the streaming services.
The requirements
Datarhei’s Restreamer is operated as a Docker container. A simple Linux server is therefore sufficient to run the software. As long as we simply forward the stream directly to Twitch, YouTube, etc., this server does not need a lot of computing power. If the server needs to recode due to unsupported resolutions, we may have to choose a slightly more powerful server.
The inexpensive CPU-only cloud servers from Paperspace are suitable for irregular streams. These can be created and deleted as required within a few minutes and you only pay for the time the server was active. If you stream regularly, a real VServer from Netcup, for example, is better and cheaper. A simple server here costs from around €3 per month.
The installation
First we need to install Docker. Docker allows us to run so-called containers on the server. A container is basically an isolated application within a computer, similar to a virtual machine. To install Docker on Linux, we first need to execute a few commands for package management. To do this, we need to be connected to the server via SSH.
sudo apt-get install ca-certificates curl gnupg
sudo install -m 0755 -d /etc/apt/keyrings
curl -fsSL https://download.docker.com/linux/ubuntu/gpg | sudo gpg --dearmor -o /etc/apt/keyrings/docker.gpg
sudo chmod a+r /etc/apt/keyrings/docker.gpg
Now we can store the repository.
echo \
  "deb [arch=$(dpkg --print-architecture) signed-by=/etc/apt/keyrings/docker.gpg] https://download.docker.com/linux/ubuntu \
  $(. /etc/os-release && echo "$VERSION_CODENAME") stable" | \
  sudo tee /etc/apt/sources.list.d/docker.list > /dev/null
We then update the package sources once again using
sudo apt-get updateand start the installation via
sudo apt-get install docker-ce docker-ce-cli containerd.io docker-buildx-plugin docker-compose-pluginHere we usually have to confirm the installation by entering “y”.
Now that Docker is installed, we can start the container directly with a single command.
sudo docker run -d --restart=always --name restreamer -p 8080:8080 -p 8181:8181 -p 1935:1935 --privileged datarhei/restreamer:latestThe specifications 8080:8080, 8181:8181 and 1935:1935 stand for so-called port mappings. In order for the container to communicate with the outside world, the ports used internally must be assigned to a port on the server. As soon as Docker has downloaded the image of the restreamer, the application is started directly.
The configuration
By default, the Restreamer web interface runs on port 8080, so we can reach the software at
http://IP-adress-of-the-server:8080/ui
On our first visit, we also have to create a login directly.
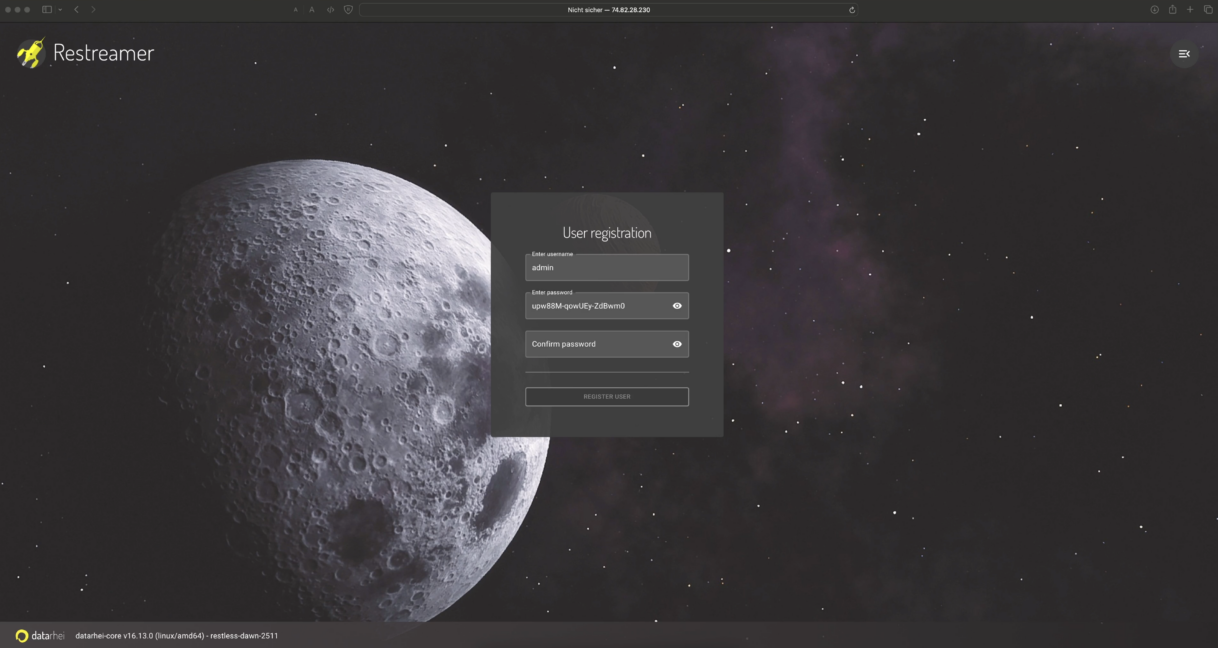
After creating the user, we can start directly with the setup. We select RTMP server as the stream source and activate it with a tick in the checkbox. We can also enter a stream key in the Token field to increase security. Otherwise, anyone who knows the IP address and port of the RTMP server could publish their stream via it.
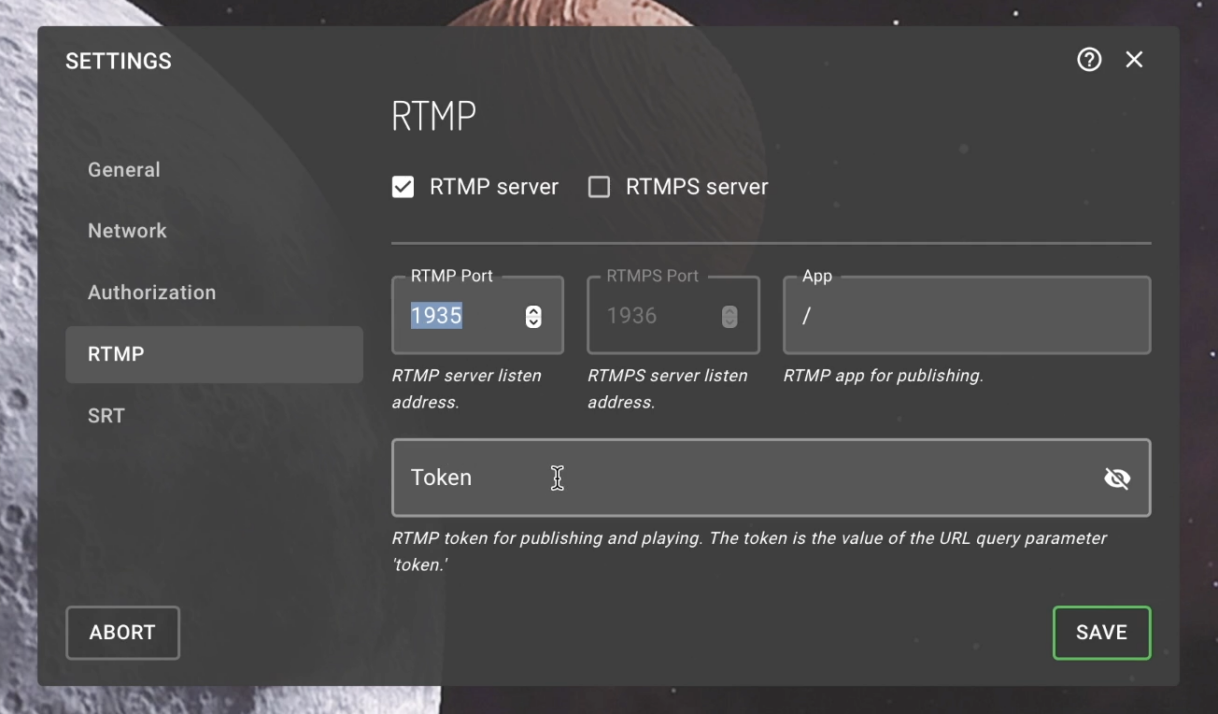
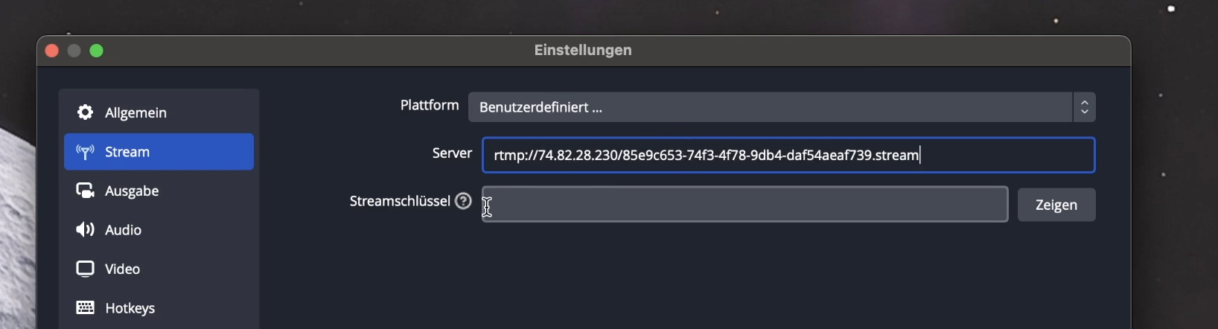
Click on Save to save the whole thing and restart the Restreamer once. Now we select the RTMP server again in the selection menu. An address is now displayed here. We enter this address in OBS (or Streamlabs, etc.). If we have stored a token in the Restreamer, we must store this as a stream key.
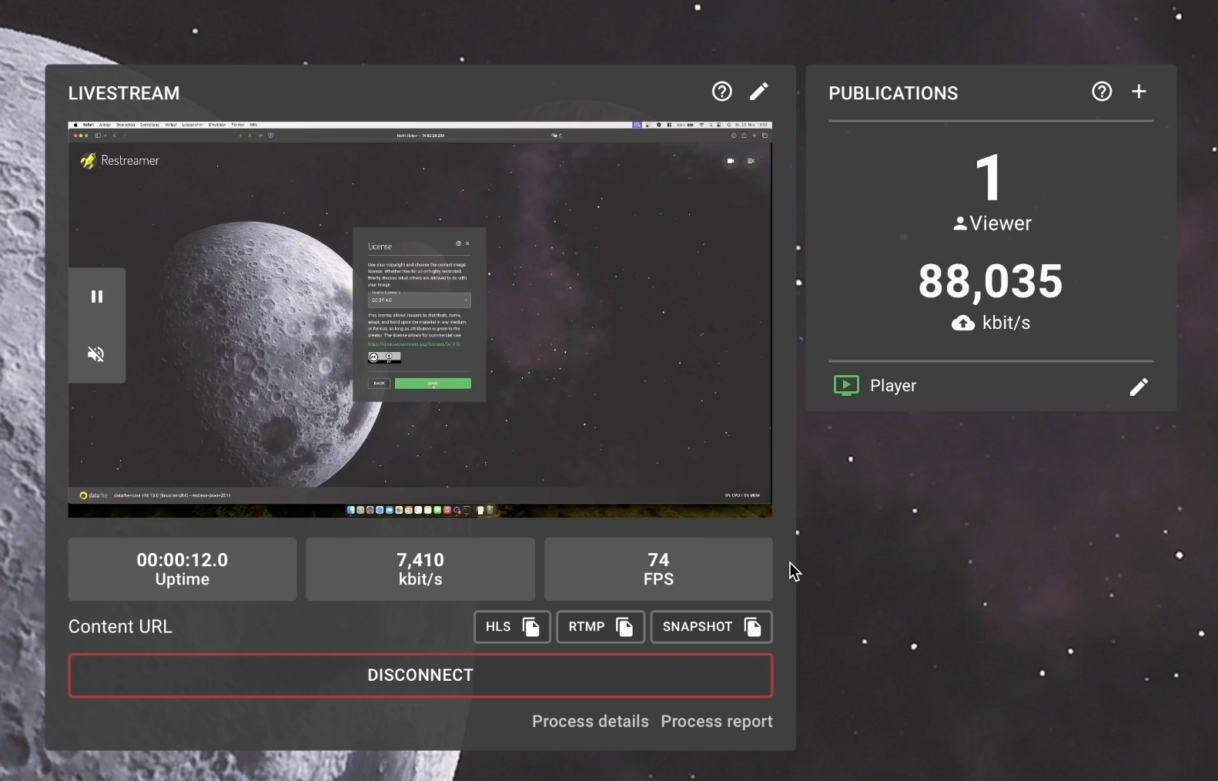
If we now start the stream in OBS and click Next in Restreamer, the server already recognizes our stream. We can simply confirm the other messages regarding audio, metadata and copyright. We then land in the standard view of Restreamer, where we can see some information about our stream, a preview and the connected services.
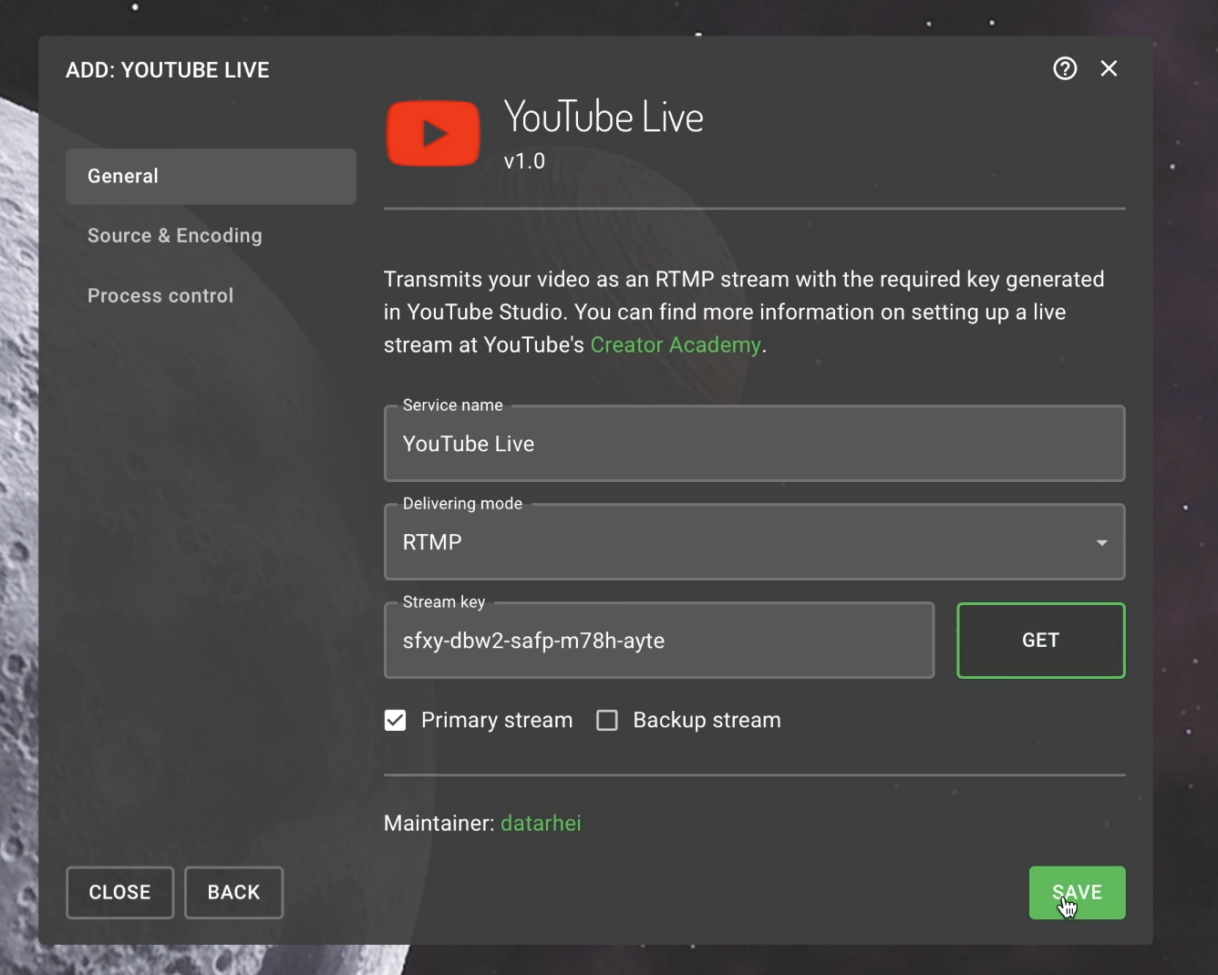
Clicking on the + in the top right-hand corner opens the menu for adding our desired streaming provider. There are two options here. The pre-installed providers only require the stream key and take care of the rest of the configuration themselves.
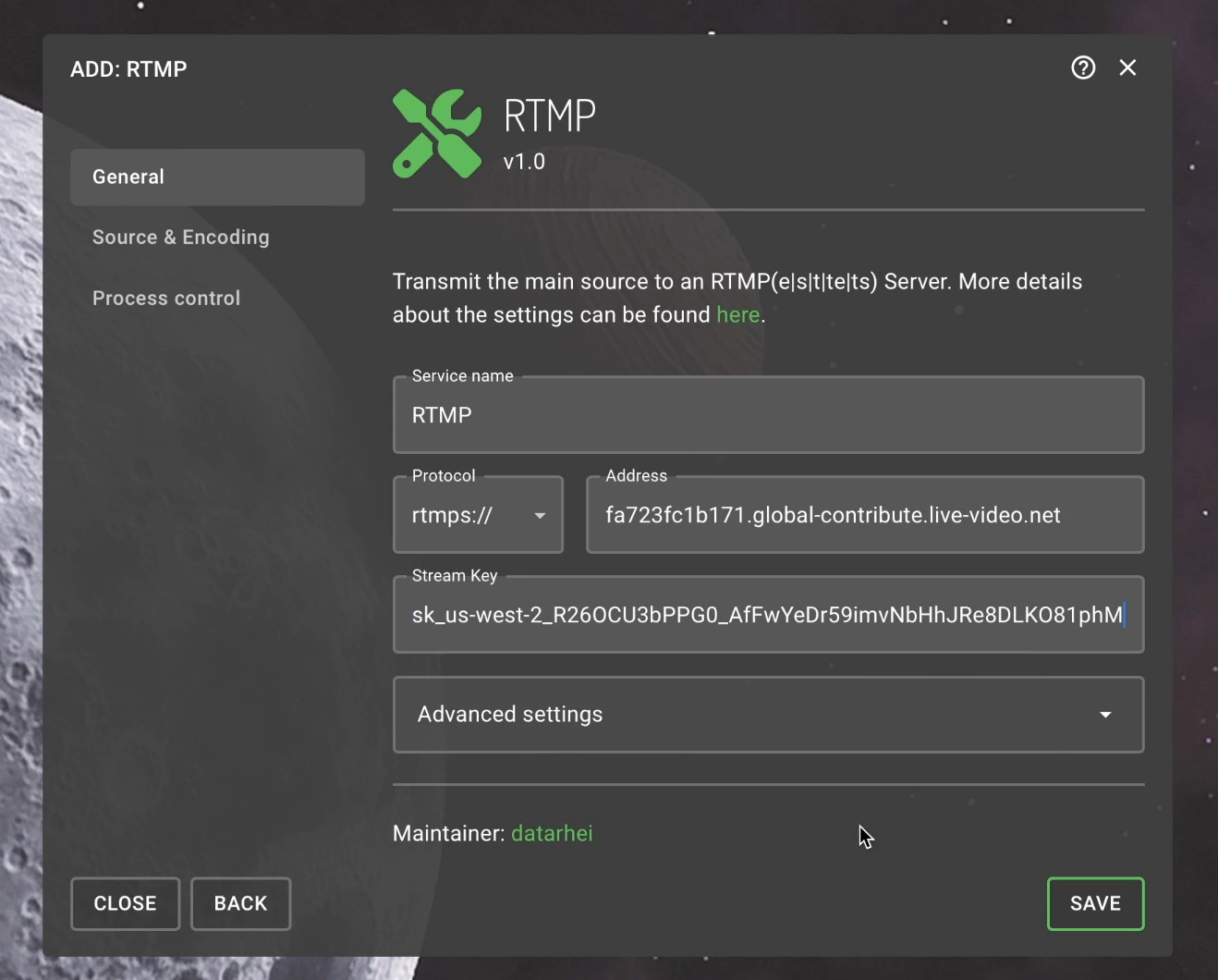
For providers that are not pre-installed, we usually have to select the RTMP entry. In addition to the stream key, we then enter the address of the server and the correct protocol. In the Kick example, we select rtmps:// and the address from the Kick dashboard.
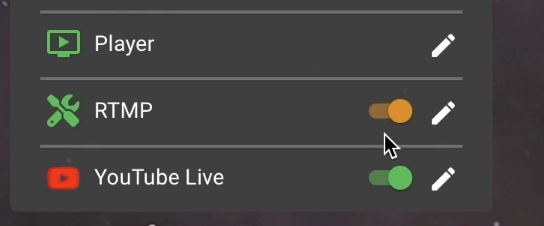
After we have added all streaming providers to the Restreamer, we still need to activate these so-called publications in the home screen using the switches. While the switch is orange, the connection is currently active. Green means that the stream is running.
Our stream is now live on the desired platforms and we can close the Restreamer. We no longer need to open it for future streams. It runs in the background and works fully automatically.


