
Old game consoles. For many, a part of their childhood. Feelings of nostalgia. I wonder how many hours I spent on Nintendo 64, Game Boy or Playstation 1? Certainly several hundred or even a thousand. Often you feel the desire to simply unpack one of the old classics and revive your childhood. But to buy consoles especially for that? In addition, there is the problem of connecting old consoles to new TV models that no longer have a Scart connection. This is where the RetroPie virtual console comes in.

What is RetroPie?
RetroPie is a complete interface for game emulators on the Raspberry Pi. A big advantage over individual emulators is certainly the collected display and operation. RetroPie already has emulators for most common consoles from Nintendo, Sony and SEGA on board in the standard and also exotics like the Wonderswan are included. A list of all included systems can be found here.
Thus, several systems can be conveniently implemented in the living room at relatively low cost, without having to purchase each console including its controllers yourself. This also saves a lot of space.
Requirements
The requirements are clear. You don’t need very much hardware.
- Raspberry Pi* (Model 3B+ recommended)
- MicroSD memory card* (16GB or more recommended)
- Game controller or keyboard (keyboard recommended for setup)
- Micro USB power adapter* (5V/2.5A recommended)
- HDMI cable*
It is also recommended to use a small case* for the Raspberry to protect the components.
Thus, in total (depending on the controller used) costs in the amount of 60-80€ for the entire project.
Installation Raspberry Pi
The installation of the required software on the Raspberry is very simple. Linux knowledge is not necessary thanks to a complete image. You only need:
- RetroPie Software
- Archive software like 7Zip
- SD card preparation software (like Win32DiskImager)
The archive with the RetroPie software is unpacked using 7Zip. The resulting .img file is then selected as the source file in Win32DiskImager, your SD card is selected in the disk selector on the right and then click Write.
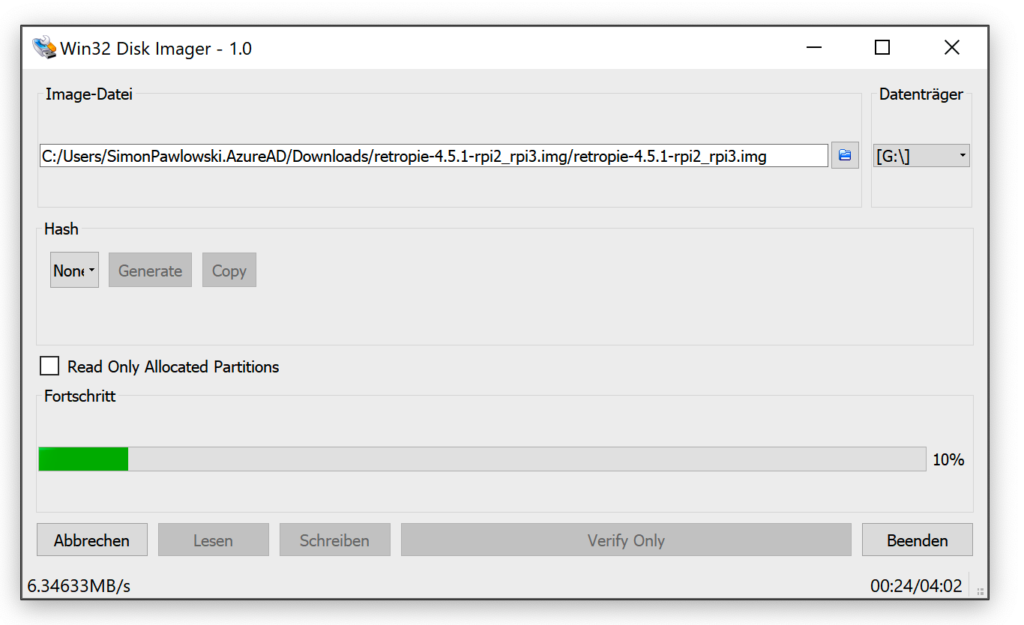
After a few minutes the writing of the card is finished and the software can be closed. Now the card can be inserted into the Raspberry and the Raspberry can be connected to the TV / monitor via HDMI and supplied with power.
Setup RetroPie
When RetroPie is started for the first time, it asks you to configure (at least) one controller. This can be a keyboard or a standard controller for game consoles. If it is a Bluetooth controller, the first configuration should be done with a keyboard, because Bluetooth controllers have to be connected first. In the configuration, all the necessary buttons of the controller are assigned, so that you can control both the RetroPie interface and the consoles themselves.
The setup is then completed for the time being and theoretically you can start right away, but this makes little sense without games!
For a comfortable filling of the game collection, it is recommended to connect the Raspberry via LAN or WLan. The model 3B+ already has WLan on board, which is why I chose this connection. To connect to the existing WLan network, simply select the “RetroPie” menu item in the main menu and go to the “WiFi” item. In the following menu, select “Connect to WiFi Network” and connect to the existing WiFi network after specifying the country.
Games installation
Adding more games is then very simple. The simplest solution in my eyes is the possibility to import the data directly via the home network. RetroPie already has the appropriate folders as a share. To do this, simply connect to “\retropie” in Windows Explorer and navigate to the “roms” folder. If Windows asks for a password when connecting, you can simply enter pseudo values and the connection will still work.
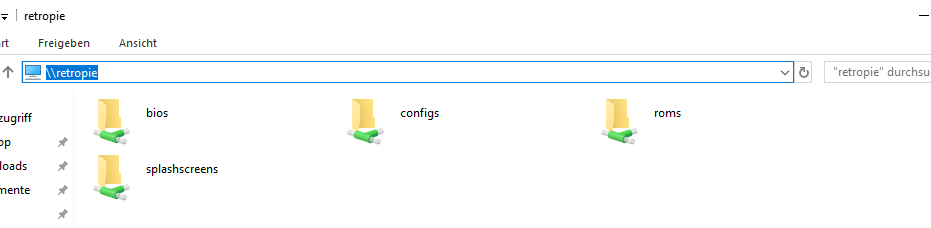
The folder contains other folders for the corresponding game consoles. The game files are placed directly in the game console folder.
After all games have been “installed”, the RetroPie interface must be restarted once. Simply press the start button in the start screen and select “Quit” -> “Restart Emulationstation”. After a short restart, the added games should be available.
Problems that may occur
Of course, problems can also occur. I will discuss the known problems and possible solutions here. If further problems / questions should arise, please send an email to info@aytee.de.
Missing BIOS for consoles
When playing some Playstation games, a message regarding a missing BIOS was displayed at startup. In addition, the game then did not work cleanly.
This problem could be circumvented by placing a BIOS file for the corresponding console in the “bios” folder.
Games are not recognized
Some consoles need another file besides the actual game image to run the games. This file can easily be created by yourself.
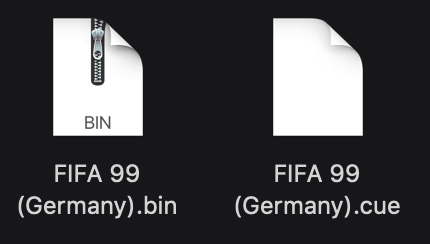
Just create the file via text editor and save it from .cue file.
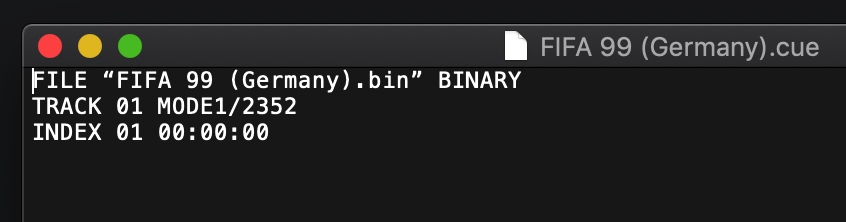
The content of the file is very clear. Only the file name of the associated game must be specified.
FILE “xyz.bin” BINARY
TRACK 01 MODE1/2352
INDEX 01 00:00:00
After restarting the emulation station, the game should be executable.


